
Main Sequence Factory Layout: A Plan That Scales
A practical Main Sequence factory layout: production cells, a corridor spine, belt direction, hall sizing, and the expansion mistakes that trap new stations.
The hardest moment in Main Sequence is not the first station. It is the moment you realize the first station has no room for the machine you just unlocked. The floor is full, the belts cross, and every new module requires deleting something that was working.
A layout prevents that moment. This guide describes a compact, expandable pattern built around production cells and a corridor spine. It assumes you have placed a Command Module and a dock, and that you are about to build your first real production block.
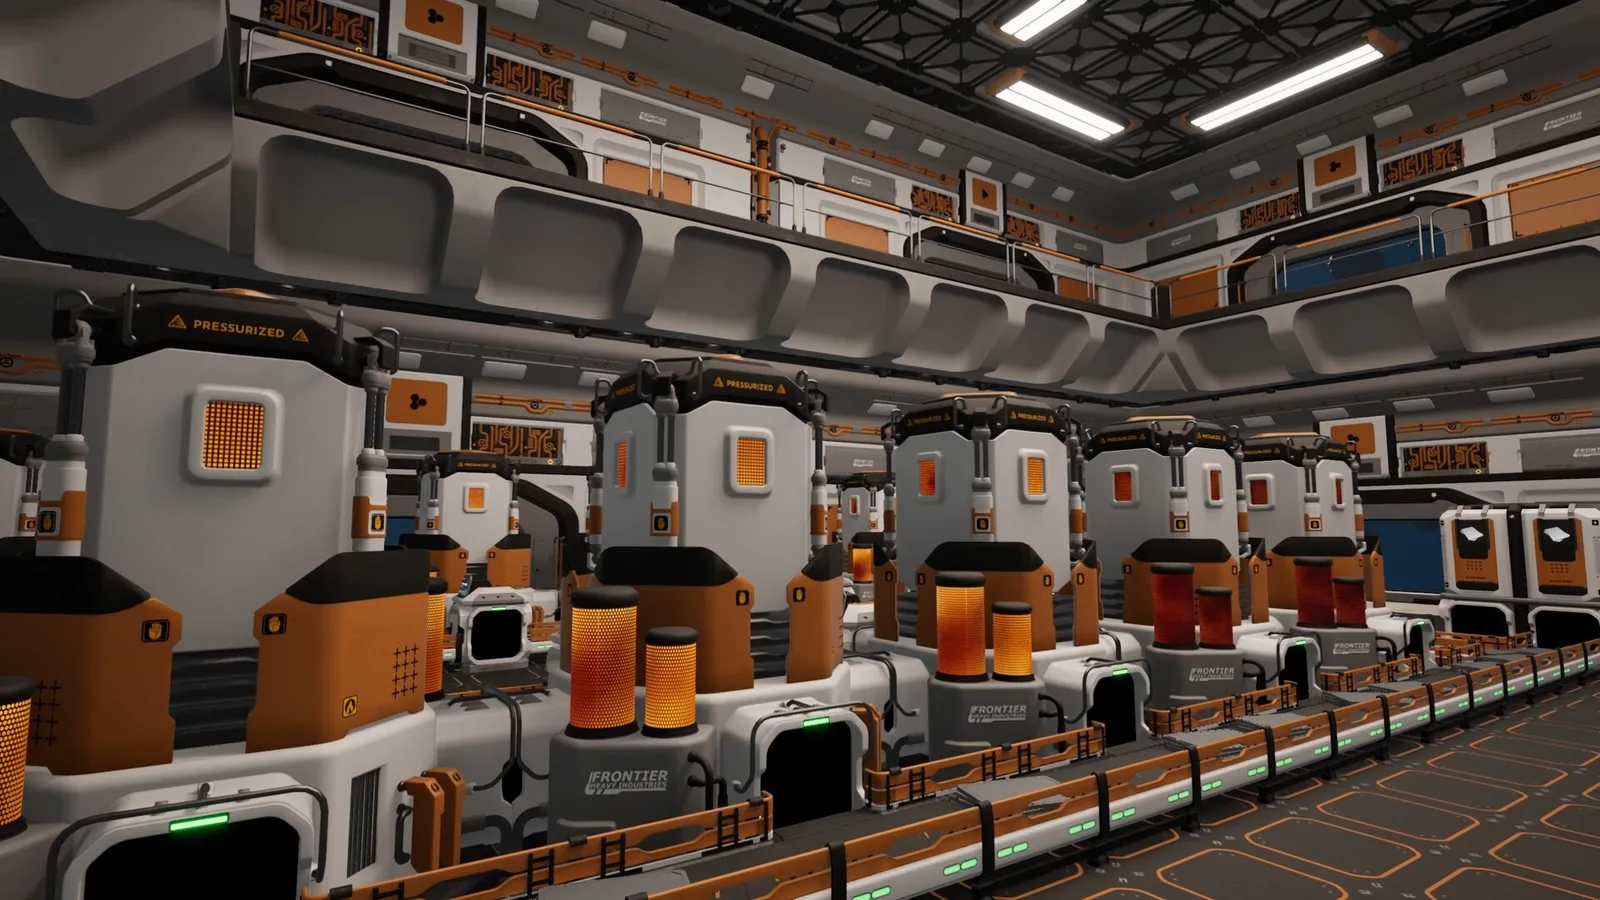
Build in cells: one refinery, one assembler, and a short belt per cell, with a corridor spine between them.
The cell: the smallest unit worth building
A cell is one machine group, one input container, one output container, and the belts between them. For example:
- Input container: nickel plates.
- Machine: assembler making Magnetic Coils.
- Output container: coils.
- Belt: input → machine → output.
The cell has three advantages over a monolithic factory floor:
- It is debuggable. If coils stop, you check one input, one machine, one output.
- It is movable. You can delete a cell without touching the rest of the base.
- It is expandable. When demand doubles, you copy the cell next to the original and merge the outputs.
The cell is also the right unit for power planning. An assembler at 6 MW plus a refinery at 4.5 MW is a 10.5 MW cell, which fits under a 12 MW solar panel with a little headroom. Two cells do not fit; that is your signal to add generation.
The spine: one corridor, many branches
Station modules connect through corridors. A spine layout uses one long corridor as the main street, with production halls branching off it. The spine carries no items by itself; it carries the player and the build order.
Why a spine instead of a grid? Because a grid has no natural expansion direction. Every new hall competes for perimeter space. A spine can be extended at one end, and every branch remains reachable.
Build the spine with these rules:
- Leave one free connection at the far end for expansion.
- Put the dock at one end of the spine, not in the middle.
- Put power at the opposite end from the dock.
- Keep branches short: a hall two modules deep is easy to serve, a hall five modules deep is a tunnel.
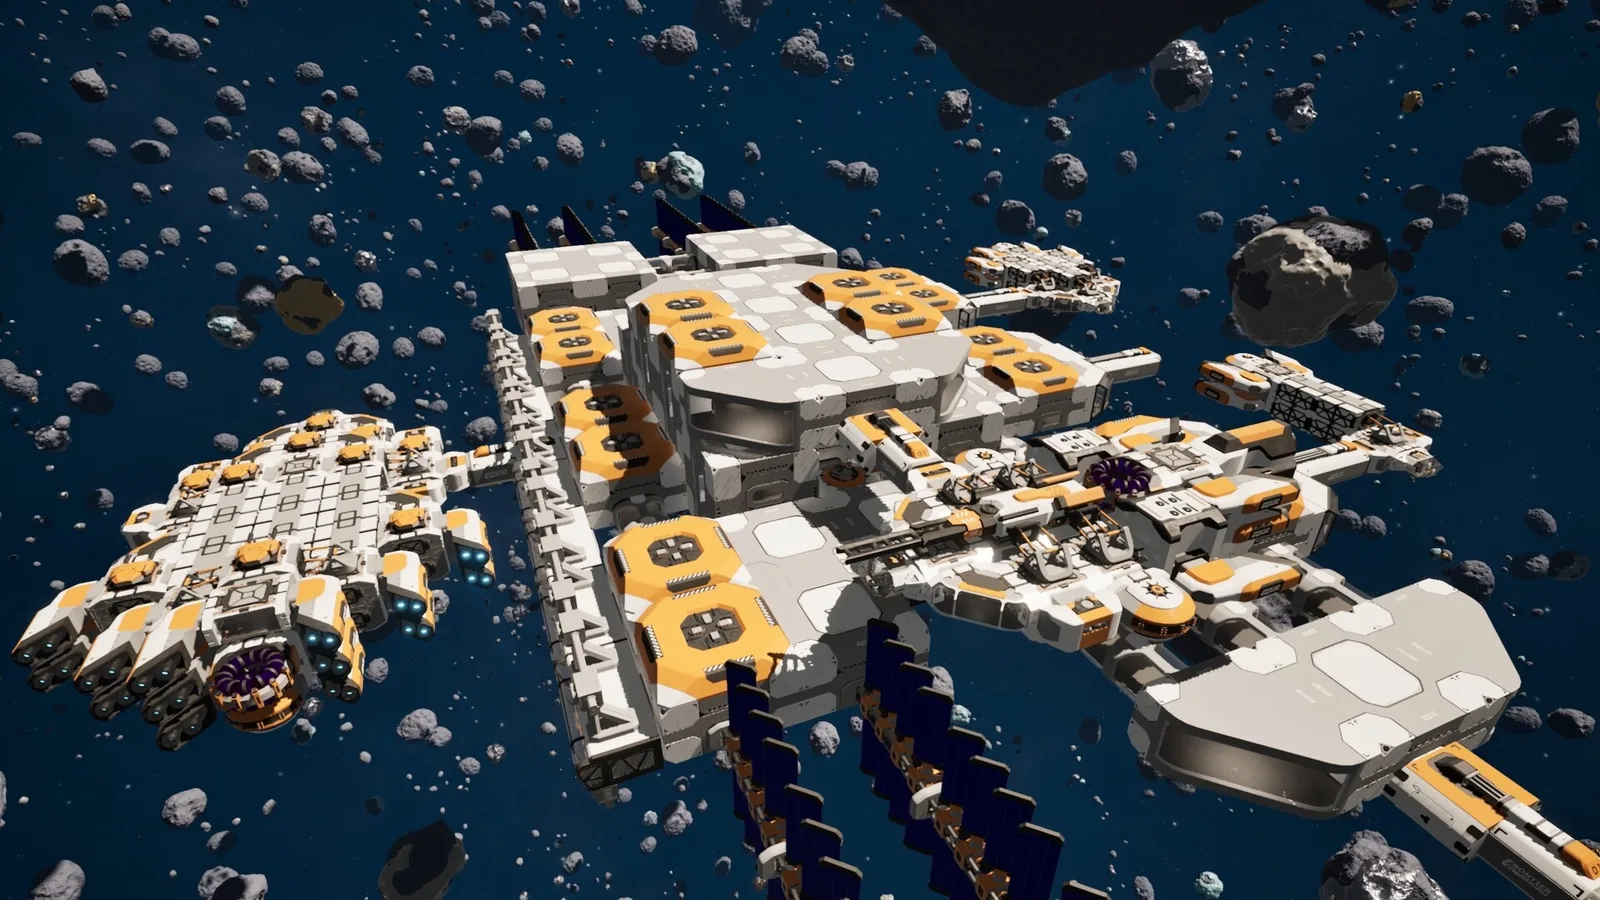
Hall sizing: 2×2 for production, 1×1 for oddballs
The 2×2 A hall costs 40 Hull Plates and holds four 1×1 modules' worth of floor with fewer walls and shorter belts. Use it for any production block with more than one machine. Use 1×1 rooms for single machines that do not share inputs, such as a relic analyzer or a trade console.
Do not build a 2×2 hall for one assembler and then fill the rest with decorative space. Empty floor is a cost you pay once; a badly placed wall is a cost you pay every time you expand. If you are unsure, build the small room and upgrade later by removing a wall and adding a hall.
The 2×2 B variant costs Reinforced Plates instead of Hull Plates and is armoured. It is the right choice for a hall on the station's outer face, where relic attackers can reach it. The interior halls can use the cheaper A variant.
Belt direction: one way, short, and visible
Belts in Main Sequence are directional and visually readable. The layout should make the direction obvious at a glance:
- Raw ore enters from the dock side.
- Refineries sit between raw storage and plate storage.
- Assemblers sit between plate storage and component storage.
- Science labs sit at the end of the chain, fed by a dedicated container.
Avoid bidirectional belt runs where the same segment carries two recipes. The game may allow it, but the moment one recipe backs up, the other starves and you cannot see why. One belt, one direction, one item type is the rule that keeps a factory legible.
If a belt must cross another, use a bridge or a gap rather than a merge. Merges hide throughput problems; bridges keep both streams visible.
Power placement
Power is station-wide, so a generator does not need to be near its consumers. That freedom is useful: put solar panels on the sun-facing side and reactors in an armoured hall, and run the belts to the production blocks.
The layout cost is fuel logistics. A reactor needs a fuel belt from storage, and that belt should be short. Put the reactor hall next to the fuel container, and put the fuel container next to the dock that receives ice or hydrogen.
Leave one empty 1×1 slot next to the reactor for a second generator. The moment you add an advanced assembler at 18 MW, you will need it.
The expansion path
A station built on this pattern expands in four stages:
- Starter: command, dock, solar, refinery, assembler, two containers.
- Automation: drone bay, second refinery, second assembler, lab.
- Industrial: industrial dock, second power block, 2×2 production halls.
- Shipyard: separate branch with its own reactor, shipyard core, and side modules.
Each stage adds one branch to the spine. If a stage requires deleting a previous branch, the layout has failed; that is the signal to build a second station instead.
Two stations are not a defeat. A refinery station and a shipyard station can each be compact and well-powered, and haulers between them are cheaper than a single station that has become a labyrinth.
Common layout mistakes
- Dock in the centre. Every ship has to fly around the station, and every belt crosses the dock approach.
- Power at the edge of expansion. The next hall has nowhere to go because the solar array occupies the only free side.
- One giant hall. A 2×2 hall with six machines and no storage buffer is a traffic jam with walls.
- Belts under the floor. If you cannot see the belt, you cannot diagnose it.
- No empty slot for the next machine. Always leave one 1×1 gap in a production hall.
The production chains guide→ shows the machine ratios behind the layout.
FAQ
What is the best hall size? 2×2 A for production blocks, 1×1 for isolated machines, 2×2 B for exposed outer faces.
Should I use a main bus? No. Use cells and a corridor spine; a bus is overkill for the early game.
How wide should the corridor spine be? One module wide is enough. Leave a free connection at the far end for expansion.
Can I stack production vertically? The station is three-dimensional and the demo shows multi-level halls. Build upward when the floor is full, but keep belt access visible.
When should I build a second station? When a new branch would require deleting a working one, or when power and logistics are already at their limit.
Official source: Main Sequence on Steam ↗ and the Steam news hub ↗.
Sources
- Main Sequence on Steam ↗ — station and factory description.
- Steam news: 21 October 2026 hotfix ↗ — dock filter and engine object limits.
- Steam news: Next Fest demo update ↗ — demo systems.
- Main Sequence on SteamDB ↗ — build reference.